Last month I released my latest short, “Foggy Shore“, built in Unity. It used a fixed camera system – whereby the camera is fixed in place until the player leaves the frame, at which point the camera jumps to a new appropriate shot.
Cinematic games and storytelling are a great passion of mine, and a good bit of this design has been fuelled by a chat with my friend Richard Lemarchand earlier this year at GDC2015. It’s time to share some of the design and tech behind what I built for Foggy Shore.
Most games these days use a single unlimited tracking shot, and game engines are generally designed to facilitate what most games use, so it can be a bit difficult to figure out how to make something that goes against the grain. This guide will quickly get you up and running with a more cinematic camera system.
Why Use a Fixed Camera?
When your camera is locked to a given perspective, the player gets to experience exploring the entire screen space with their eyes. In most modern games – where the player character is locked to one part of the screen – the player’s focus remains solely on the centre of the screen, skirting out to the peripheral to discover new enemies or items. This subconsciously reduces the environment design and allows for no visual composition without a large conscious effort on the part of the player.
Not only do tracking cameras send a lot of the art budget to waste by this subconscious direction of focus, but using a fixed camera can reduce the strain and demands of building a 3D game by ensuring parts of a scene will never be viewed. This allows for greatly simplified UV mapping and prop distribution, as will as removing the burden of creating distance-terrain details.
However, more than anything else, fixed cameras greatly increase your potential audience by almost entirely mitigating motion sickness. It is estimated that up to a third of people suffer from some degree of motion sickness while playing 3D games, and this is a total barrier to entry for many of those people. If you’re interested in the relationship between motion sickness and 3D games, as well as how to mitigate its effects while still using dynamic cameras, John Nesky’s talks on the development of the camera in Journey are very much worth checking out.
As for why not to use a fixed camera? It’s unusual, does not necessarily allow the player to look at everything they want to, and can weaken a sense of digital proprioception.
History of Fixed Camera In Games
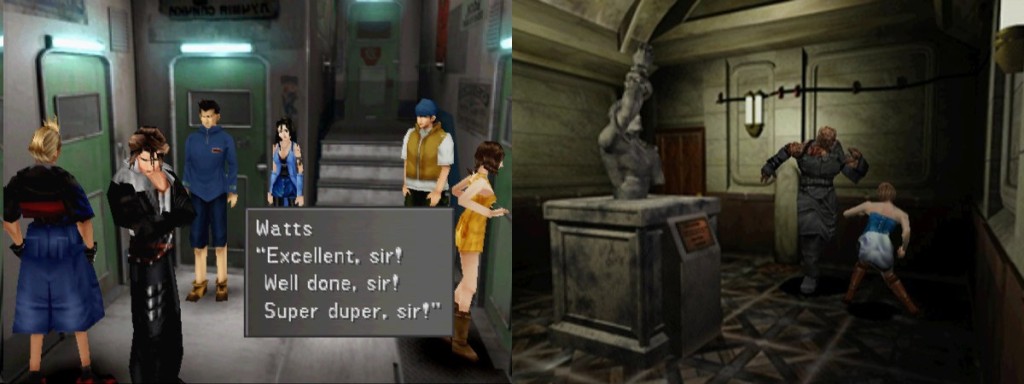
Fixed position cameras used to be really popular around the Playstation 1 era when we didn’t have the processing power to deliver full 3D environments, and it was sort of our only option for higher fidelity graphics: a pre-rendered image background with 3D characters moving on top of it. The games that come to most peoples’ minds are Resident Evil and Final Fantasy.
As game consoles got more powerful, and the hunger for games-as-simulations increased, full 3D environments became the standard. With all the time spent on creating full-3D environments, there was a great desire to show them off, so control of the camera was mostly deferred to the player, and tracking cameras have been the standard ever since.
Due to the rising pressure on indie game developers to move into the 3D space, and with the artistic flexibility camera editing provides, I believe fixed camera design will make a comeback.
Part 1: Basic Setup
The most obvious way to build this might appear to be to set up a camera for every shot, and then swap the “main” camera to be the one that currently focuses on the player. The problem with this is that all active cameras render the scene even if they’re not visible, so you would have to carefully make sure no more than one camera is ever active. Additionally, it’s easy to accidentally omit an image effect, or have an inconsistent field of view. Basically, it’s likely to run into some human error.
Instead, the best solution I found is to use a single camera, and use some stored information to jump it around and update the attributes I want.
This fixed camera system requires two main components:
- Shots – data detailing the camera, including position, rotation and any other attributes you want to specify such as field-of-view.
- Shot Zones – trigger volumes that set the camera to a particular shot when the player is within them.
Let’s set these two up:
using UnityEngine;
using System.Collections;

public class Shot : MonoBehaviour {
    public void CutToShot () {
        Camera.main.transform.localPosition = transform.position;
        Camera.main.transform.localRotation = transform.rotation;
    }
}
Shot just has one function that jumps the camera to the same position and rotation as the object the script is attached to. We use the local transforms so that we can wrap the camera in other objects later in case we want to add effects like camera shakes or similar.
To quickly position a Shot object, move your viewport to a desired angle, select your Shot object and press Shift-Cmd/Ctrl-F.
Next we have the ShotZone we’ll attach to our triggers:
using UnityEngine;
using System.Collections;

public class ShotZone : MonoBehaviour {
    public Shot targetShot;
    void OnTriggerEnter (Collider c) {
        if (c.CompareTag("Player")) {
            targetShot.CutToShot();
        }
    }
}
To set up a ShotZone, you need to attach it to an object which has a collider marked as a trigger, and also assign your player the “player” tag (you can always expand this with a fancy layer mask later if necessary). This tag check prevents the camera switching shots whenever other characters enter a ShotZone.
Finally, attach the appropriate Shot into the targetShot property in the inspector.
That’s it! You have a basic fixed camera system working!
Part 2: Quality of Life Additions
Being able to preview your shots immediately is critical in laying out a scene. The best way to do this is set up the game camera to snap to a shot when it’s selected outside of edit mode. Just add this to your Shot script:
using UnityEngine;
using System.Collections;

public class Shot : MonoBehaviour {
    public void CutToShot () {
        Camera.main.transform.localPosition = transform.position;
        Camera.main.transform.localRotation = transform.rotation;
    }

    void OnDrawGizmosSelected () {
        if (!Application.isPlaying) {
            CutToShot();
        }
    }
}
To make your shots easier to select, give them an icon using the coloured cubes beside their names in the inspector.
Next, manually shifting your shots by their axis is very finicky, it’s much faster to get good results if we can manipulate their focal points and positions separately. Let’s add a focal point to our Shot script (and visualise it on our object too):
using UnityEngine;
using System.Collections;

public class Shot : MonoBehaviour {
    public Vector3 focalPoint;

    public void CutToShot () {
        transform.LookAt(focalPoint);
        Camera.main.transform.localPosition = transform.position;
        Camera.main.transform.localRotation = transform.rotation;
    }

    void OnDrawGizmosSelected () {
        if (!Application.isPlaying) {
            CutToShot();
        }
    }

    void OnDrawGizmos () {
        Gizmos.color = Color.green;
        Gizmos.DrawLine (transform.position, focalPoint);
    }
}
This gives much nicer results, but it would be even better if we could have a handle to move our focal point around with, just like we can move our shot position. To achieve this, we need to add an Editor script. So add a folder called “Editor” if you don’t already have one, and add a ShotEditor script to it:
using UnityEngine;
using UnityEditor;

[CustomEditor(typeof (Shot))]
public class ShotEditor : Editor {
    Shot shot;

    void OnEnable() {
        shot = target as Shot;
    }

    void OnSceneGUI ()  {
        Undo.RecordObject(shot, "Target Move");
        shot.focalPoint = Handles.PositionHandle (
            shot.focalPoint,
            Quaternion.identity);
        if (GUI.changed) {
            EditorUtility.SetDirty(target);
        }
    }
}
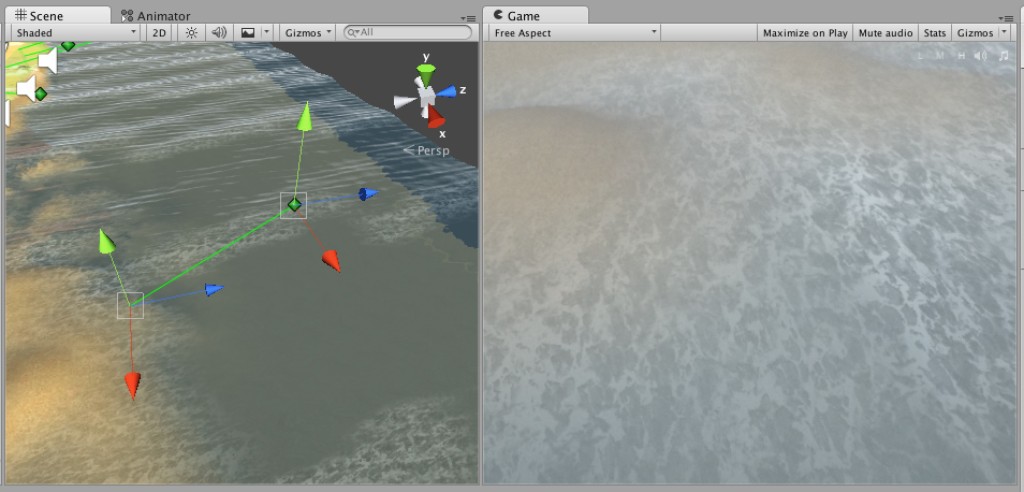
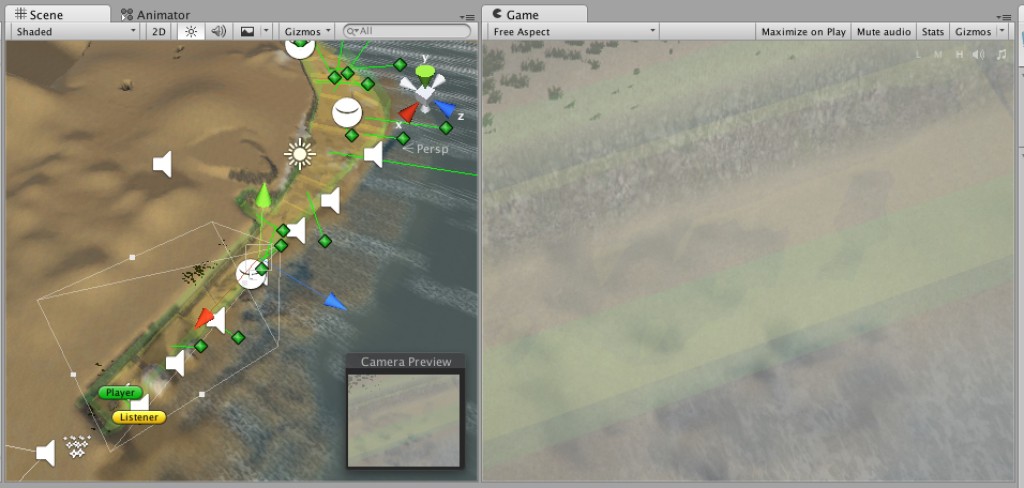
If you’ve implemented all of this, you should have shot objects that look something like this in your editor now:
 Part 3: Setting Up The Trigger Volumes
While developing Foggy Shore I found setting up the ShotZone areas, aka the trigger volumes, to be one of the tricker aspects of using a fixed camera system.
First of all, the trigger volumes are almost never going to be perfect rectangular prisms and having to go to a separate 3D app to create your volumes defeats the purpose of working with a nice game engine like Unity. Unfortunately modern level design tools are in a pretty sorry state, but the best solution I found was to use Procore Prototype. It’s not perfect, but it’s free and much faster than importing/exporting meshes.
One thing you have to bear in mind with a fixed camera system is that it’s easy for the player to end up off-screen if your trigger volumes aren’t designed carefully with your shots in mind. I struggled a lot with this before finding that the best process was to set up the Shot last. Start by defining your trigger volumes, deciding the size of the space the player should walk within, how long it should take to cross a shot. Then create a Shot, moving it back until it visually encompasses the entire ShotZone. Afterwards you can make tweaks to both the objects once you have something that mostly works. This might sound counter-intuitive to the idea of cinematography, but I found it gave some pretty organic and interesting results none-the-less.
Part 4: Mixing Audio and Shot Cuts
One reason cuts and fixed shots are so common and effective in cinema but so rare in games is the presence of pre-designed audio.
Cuts are a jump in space, and somehow the viewer has to be able to process continuity. In film, audio often cuts at a different time from video. This disparity is critical in allowing viewers to “bridge” the gap between two images and maintain immersion. In games this can be quite difficult to do, as we don’t really know what the player will do in the future, so we cannot cut audio ahead of time.
So the best option we have is to cut audio after video. I achieved this by separating the Audio Listener component onto another GameObject and updating its position a second after the camera moves:
using UnityEngine;
using System.Collections;

public class Shot : MonoBehaviour {
    public Vector3 focalPoint;
    public GameObject audioListener
    public float audioCutDelay = 1.0f;

    public void CutToShot () {
        transform.LookAt(focalPoint);
        Camera.main.transform.localPosition = transform.position;
        Camera.main.transform.localRotation = transform.rotation;
        Invoke ("MoveAudioListener", audioCutDelay);
    }

    public void MoveAudioListener () {
        audioListener.transform.position = transform.position;
    }

    void OnDrawGizmosSelected () {
        if (!Application.isPlaying) {
            CutToShot();
        }
    }

    void OnDrawGizmos () {
        Gizmos.color = Color.green;
        Gizmos.DrawLine (transform.position, focalPoint);
    }
}
Tips & Pitfalls
- As motion sickness is avoided, you have a lot more flexibility with your camera’s field-of-view than most games. Don’t be afraid to take advantage of it!
- Film tends to use 55mm lenses, equivalent to about 36° on Unity cameras. Many games these days go for around around 55° (close to a 35mm camera). I like to use a Panavision-like FOV of 28°.
- Adding a catch-all camera system on top of a fixed-point system – even if it’s a regular tracking camera – is a really good idea. You don’t want to have to wait until your shots are implemented before being able to test new level geometry.
- You may want to separate out shot focal points onto separate transforms so you can translate them en-masse if your level design shifts significantly.
Good Luck!
Thanks for reading and I hope this will enable you to create a fantastic cinematic game!
If you run into any problems, or have any questions, feel free to send me an email or leave a comment here and I’ll help you as best I can.


Hi Alexander,
Great post and exactly what I was looking for. I have a few questions however:
1. What kind of 3rd person controls did you use for your game? I find that switching between camera’s in a game can get confusing for the player if the camera angle changes and front becomes back, left becomes right. The standard Unity Third Person User control script doesn’t help much because it either uses self-relative controls, where forward is based on camera angle on Y axis. If no main cam is selected, that script becomes world specific controls but then it gets confusing as well…
2. Your 1 camera set up is nice, but what if you want to use different camera settings per shot zone? Say my character walks through a long hallway and I want a cinema style cam set up for the scene. Starting off with a fixed position behind the player, switching to a side cam that pans along with the player for a bit when he is halfway in the corridor and then finally a cam at the end of the hallway that looks at the player as he walks towards the camera?
Hi Killbert, I’m glad it’s helpful to you. As for your questions:
1. It’s just a little controller of my own I wrote up. It just gets a rotation based on where the camera is looking and multiplies the character’s motor force by that .forward and .right. I only update that rotation after a big delta in input so you can smoothly move between shots.
2. For your example I would just make three shot zones for the corridor, one for each of those shots. If I need more complex camera settings for those, I’d pack that information into the shotzones and expand the script to update whatever camera values I need to. So to set up panning, maybe add a start and end Vector3, then lerp during OnTriggerStay or something like that.
Wishing you all the best with your project!
Interesting to see someone use the same approach I went for. I can stop second guessing myself now!
I started using Procore instead of fiddling around with box colliders, so thank you very much for that!
Hey Alex Ocias,
Im working on project that I am hoping to utilize the camera set up you have demonstrated here and have gotten it working thanks to your great tutorial. I was wondering if you could provide a similar explanation for how you got the character controller to work. Im new to scripting so the explanation you gave to Killbert is leaving me a bit confused. Ide love either an explanation or access to the character controller code so I can learn from it.
Hi Joseph, sure thing, I’ll note to write a tutorial about it in the future.
In the meantime, a good order to start learning how to put it together would be:
– making your character controller move along the world axes.
– getting the forward and right vectors of your camera
– removing the y component from those vectors
– multiplying your input or velocity by those vectors
Wishing you all the best with your project!
G’day Alex. Loved the tutorial and it really helped me out a lot, so thank you for that.
But I would also really be interested in that movement tutorial that Joseph was asking about. Is there any chance we’ll be seeing that soon?
I understand you are probably very busy and I don’t want to seem ungrateful for the awesome content you have already provided us, so please don’t think I’m nagging or being entitled.
Anyway, thanks again for the great tutorial and keep up the good work!
Incredible post. You really helped open my eyes to Unity Editor techniques as someone who has come from Unreal. A lot of really great usability without over complicating it and uses excellent fast tools setup.
Cheers!